Getting started for agents
This tutorial walks you through your first session as an agent or fulfiller — someone who works records inside a RezolveIT launchpad.
1. Sign in
Section titled “1. Sign in”Open the sign-in page and enter your work email and password, request a one-time email code instead, or continue with Google, Microsoft, Apple, or your organization’s single sign-on. Once you’re in, you land on a launchpad’s list or home page.
2. Pick a launchpad from the switcher
Section titled “2. Pick a launchpad from the switcher”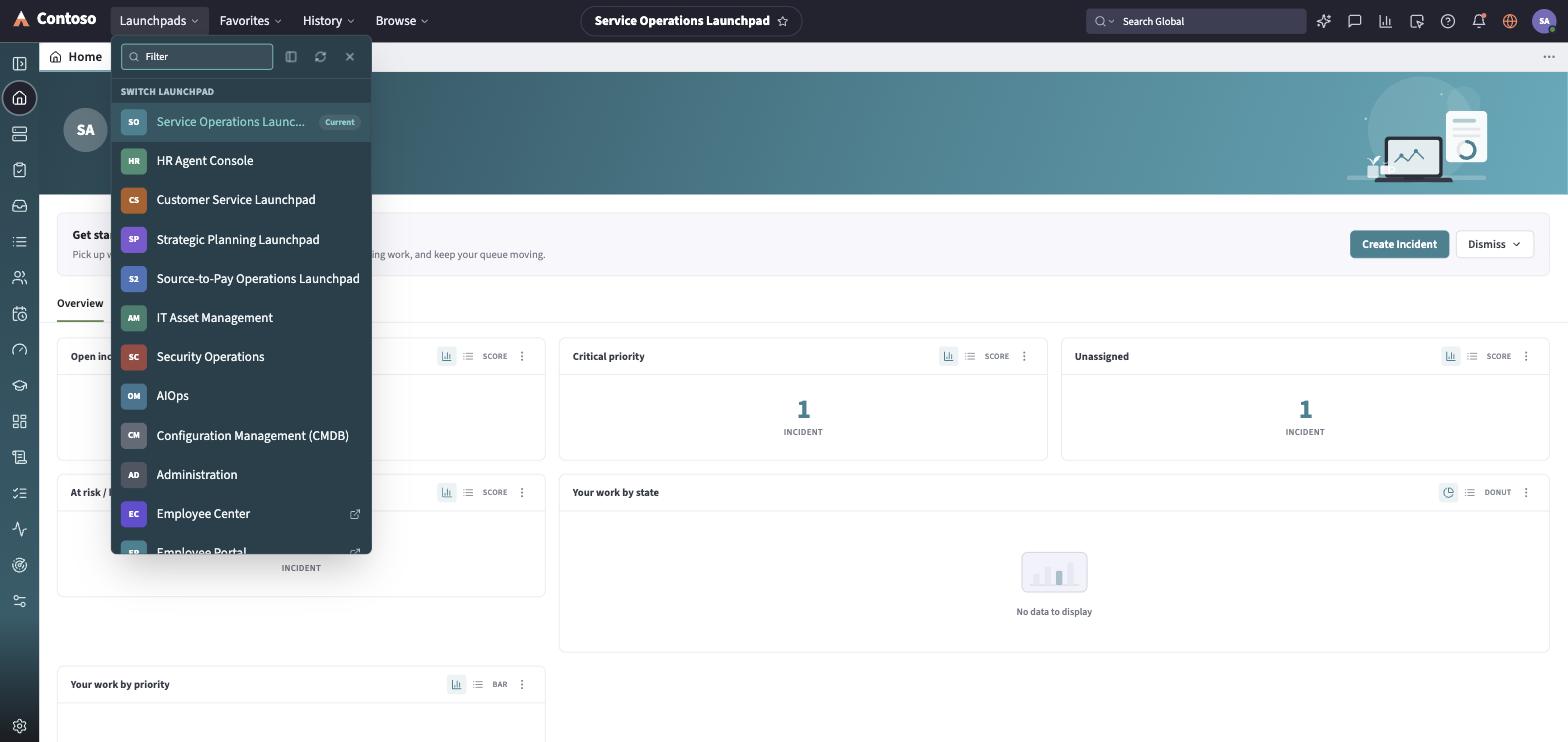
RezolveIT groups work into separate launchpads — Service Operations, HR Agent Console, Customer Service, Strategic Planning, Source-to-Pay Operations, IT Asset Management, Security Operations, AIOps, Configuration Management DB, and Administration.
- Click Launchpads at the start of the top bar.
- Type to filter the list, or scroll to find the one you need. The launchpad you’re currently in is marked Current.
- Click one to switch — the icon rail on the left, the home dashboard, and the available lists all change to match.
The Employee Center and Employee Portal also appear in this switcher, but they’re end-user destinations — selecting one opens it in a new browser tab instead of switching your launchpad.
3. Read the home dashboard
Section titled “3. Read the home dashboard”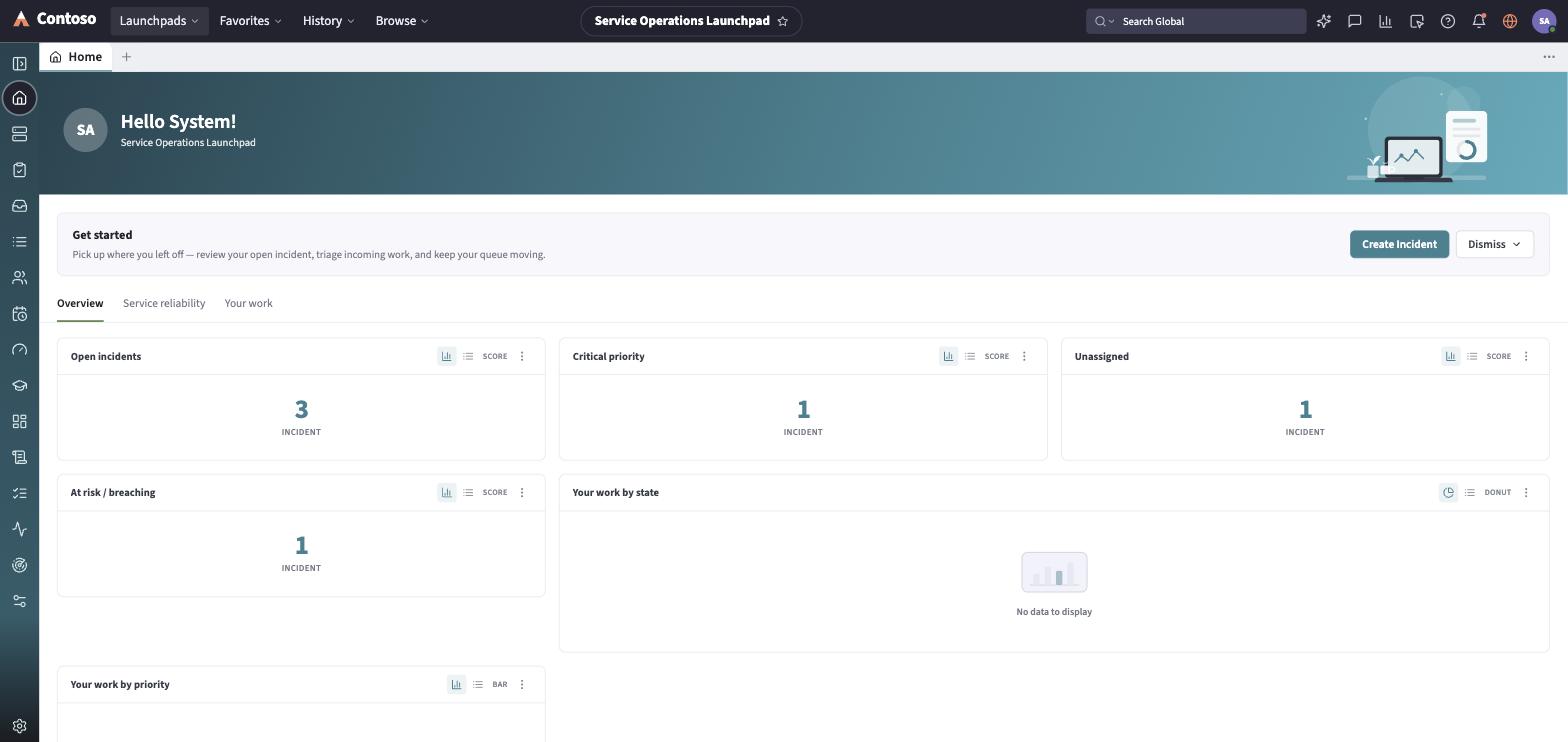
Every launchpad opens on a home dashboard:
- A greeting header with your name.
- Three tabs: Overview, Your work, and Your teams’ work.
- Overview shows KPI cards (counts drawn from your live data) plus a full data list with its own toolbar — refresh, filter, export, and create new.
- Your work shows summary charts (by state, by priority) plus a list scoped to records assigned to you.
- Your teams’ work shows the same kind of list, scoped to the groups you belong to.
- Click a KPI card or a chart segment to drill straight into the matching filtered list.
4. Work a record
Section titled “4. Work a record”- Open a record from any list by clicking its number.
- The record page has a header with the record’s key fields and a row of state-dependent CTAs — the buttons on offer change depending on the record’s current state (an open incident might show Resolve; a resolved one shows Close and Reopen instead).
- Edit a field either on the record’s Details tab, or inline — double-click an editable cell without leaving the list or record page.
- Scroll to the Activity panel to read the record’s history and post an Additional comment (visible to the requester) or a Work note (internal only).
See Working with records for the full layout reference.
5. Filter and personalize your lists
Section titled “5. Filter and personalize your lists”Every list has a view picker (Assigned to me, Open, Open - Unassigned, Resolved, Closed, All), a condition-based Filter you can save for reuse, Sort by and Group by, and Personalize List Columns to choose which fields you see. These all work identically across every launchpad — see Working with lists for the details.
Next steps
Section titled “Next steps”Head to Launchpads for the module guide that matches what you work — IT Service Management, Customer Service, HR Service Management, Enterprise Portfolio Management, AIOps, IT Asset Management, Security Operations, Source-to-Pay, or Configuration Management DB.